

Here's my haul . . . there's several types of glass beads, a fused glass pendant, a cross section of some type of nut, semi-precious stone beads, copper bells and some funky happy face beads. How's that for an eclectic assortment?After the shopping, Lucilla led a fun workshop making a collage out of photos and text from magazines. It was a round robin format with only 2-1/2 minutes to work on each collage before it was passed on.
On Sunday, I went with three friends to the Glendale Quilt Show. I'm sure you're not too surprised that I found some items that I just had to purchase. This book really grabbed my attention and begged to come home with me. It has some interesting techniques that I hope to incorporate into one of my upcoming challenges.
  And look at these beautiful soy fibers. Silk fusion is a technique that I've been wanting to try for a while. One of the vendors had a kit that contained the silk fibers, textile medium and instructions. Her instruction said that The Ultimate glue works well for heavy duty uses, so I decided to buy a bottle and give it a try.
After the quilt show and lunch, it was onto a SAQA meeting in Brentwood (LA). It's the first informal meeting of this type that I've been to; but plans are underway to have one each quarter. It was a fun afternoon spent with some very talented artists. Lucky me!
 On the left, Pat Upton uses alcohol to do an
  Theresa Ross shows different ways to use hardware store washers. They are really pretty and surprisingly heavy.
 We had to dig up all the plants and dig a trench to the water valve, and decided to abandon the old water line. We dug a 60 foot trench that's 18 inches deep along the house, down the edge of the driveway, under the driveway, to the water valve and back up under the garden to the irrigation system.
 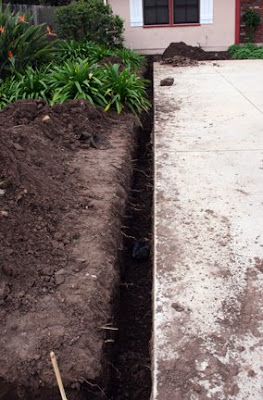 We discovered the leak on Tuesday. On Wednesday, it took 3 people six hours to dig the ditches. Thursday morning, the plumbers installed new pipes. Thursday evening we started refilling the ditches. I'm hoping that by Saturday, the plants will be back in the ground, the ditches will be filled and we'll be back to where we were a week ago.
  I used another bath mat to create the repeating squares. It had a strong architectural feeling, so I decided to add to it with a
 This colorful piece uses a
  I put a bath mat behind the silk screen and pulled yellow dye across the surface and let the screen dry. Once dry, I used clear paste for the first couple prints, then added turquoise dye.
 Here's some of the cards I created. The top left is a photo printed on fabric with painted bits. The other three are all screen printed on fabric with a little bit of embellishment.
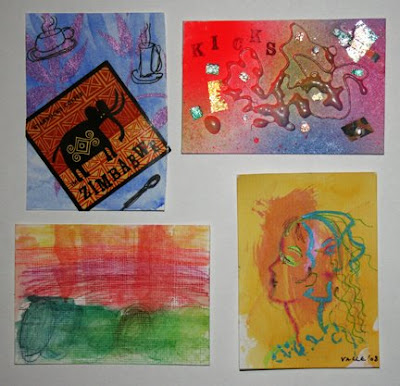 Here are some of the cards I received.
  Well, here are the long awaited photos of the waterlily quilt for Jean. I knew from the start that I was giving this quilt away, and was fine with it, but I've grown quite attached, and will be sad to see it go. Fortunately, I know where Jean lives and can visit the quilt!
  It has hand-dyed, hand-painted and commercial fabric. Some of the leaves are 3-D and some are machine appliqued and of course, the waterlily is 3-D. The Chinese letters in the top left corner translate to "Peaceful".
 Here's a close-up of one of the plants. This is a "
 Here's a cool cactus that I bought for my daughter. The cactus is soft and squishy.


