April 27, 2011

Fibervision Workshops

No matter how hard I try, I keep falling behind on my blog posts. Each month, after our business meeting and lunch, one of our Fibervision members teaches a mini workshop. They highlight whatever technique they feel someone would want to learn about. I like spending time with my friends and I like learning everything I can. I can't help it, it seems to be the way I'm wired! Some people believe that all these new techniques and subject will distract them and won't be able to focus on their own style. Not me.
Jeanne taught Free motion quilting in March. She has been doing some amazing stitching and were are lucky to some pointers from her. First we did a few pencil sketches using one continuous line, then we did the same sketch with thread on fabric. It's a good way to gain confidence in your FMQ. The next thing we did was new to me.
We dropped our feed dogs, and made a sampler of decorative stitches. It was fun trying to figure out what the stitch was going to do next. After a few minutes, you began to get a feeling for what it was going to do next and went with it. On the back side, I recorded what stitch it was and the different tension settings I used.
Here's a close-up. The stitches really have a personality of their own.
Kristin led a bookmaking workshop in April. Each of us made two different small books.
The yellow one has stitched signatures and the turquoise one has accordion pages. Both came out quite well for my first books. I'm glad I leaned how to make them, but I don't think I will be making more anytime soon.

April 24, 2011

Three's a Charm

This small piece is the third in a series, hence the title, "Three's a Charm".
If you're interested, you can see the other two pieces in the Art Gallery section. If you look closely, you'll see that they share some of the same characteristics. The reason is that the fabric was stacked in five vertical layers and paint was added to different layers. Depending on the type of paint used, some of it penetrated through several layers and some didn't penetrate at all. After it was dry, additional layers were added to enhance each piece.
The painted fabric and batting were machine stitched, then the beads were added. I painted a canvas for the background and hand stitched the finished piece through the canvas. The inner piece is 8 1/2 x 11" and the canvas is 11 x 14".
FYI: That white border is the batting.

April 17, 2011

Hormones: Divide and Duplicate

My intention was to finish this quilt for the Faulkner Gallery exhibit, but I just wasn't happy with the design. It needed something, and I just couldn't quite put my finger on what the something was. It hung on my design wall for a while until I realized that the hormones should be divided. I was afraid it was a mistake, and didn't want to start from scratch. So, I decided to do the cutting in Photoshop, and see how it looked before I took scissors to fabric. Once I played with the pieces, and saw the many possibilities, the scissors came out.
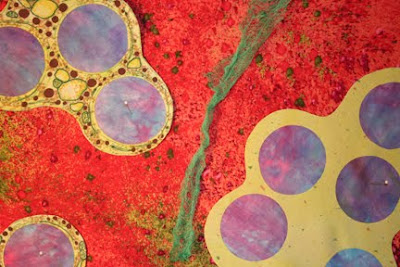
The hormones were cut apart and rearranged. But it still needed something . . . More Hormones, of course.So, here I am back at the beginning, creating even more hormones. Here's a close up of the plain yellow hormone fabric before the embellishment began. If you want to see the whole process, click here. The green strip in the middle is dyed cheesecloth that will float around the hormones. There are some other surprises in store, but you're going to have to wait a while to see the final results. It will debut in a group exhibit at PIQF in Santa Clara, CA. The exhibit is called "On the Way" and it will feature 20 Journey pieces made by Fibervision members. This will be our first group exhibit at PIQF and we're all very excited about it. Hope you get a chance to see it in person.
April 5, 2011

Scarf Redux

Thanks to the wonderful advise of Teri and Lisa, I ripped the offending scarf apart, and proceeded to knit it on circular needles. Unfortunately, nobody warned me that if you weren't careful, you could knit it together into a circle. Okay, stop laughing, it only happened twice! Now I have a pretty good idea how to make a hat. Seriously, it's so much better now. Thanks Ladies, great save!
This is my favorite scarf to date. It's knit with a yarn called Knit One-Crochet Too Cotton Ty-Dy. The lacy stitch makes and cotton yarn makes for the perfect CA scarf. LOVE IT!!
And here's a close up of the lovely lacy stitch. Another new knitting adventure!
The last post showed the orchid that was in the exhibit room. These are photos of MY actual plant. I absolutely love the visual texture! Isn't it gorgeous?
You're probably sick of reading about flowers and scarves by now. Next post will be about quilting, I promise!

April 4, 2011

The End of the Grapefruit Tree

We've been working really hard in the backyard. As you can see, the grapefruit tree is gone, the grass is dead, and quite a few plants have been removed. I'm still working on the patio design, but we're getting pretty close. No matter what we decide to do, it has to look better than it does now.The rain has finally stopped and the sun has returned to southern CA. This is a beautiful sunset that I saw from my back yard. I had to stop working and run inside for my camera. Spring is here!
A few weeks ago, I spent a fun, action packed day with my son, Jason, his girlfriend, Helen, and Helen's mom, Lisa. One of the things we did was attend a fantastic orchid show. There were so many colorful orchids in one place, I couldn't believe it.Every one of them was gorgeous and it was pretty difficult to choose a favorite, but I did. This lovely orchid came home with me.So far, it's doing great. Almost all the buds have opened, and it looks very happy in its new home. The real test is whether or not it survives long enough to flower again. I bought orchid food and read up on how to care for them. Keep your fingers crossed . . . the orchid I bought last year didn't survive. Sad, but true!

March 21, 2011

Beauty before the Storm

It's so peaceful to roam around the garden, looking for the prettiest flower, and the best angle to photograph it.
A Camellia bud getting ready to burst.

Beautiful Lilacs, a rare sight in Santa Barbara.

Brilliant Clivia's are happy in their new home under the orange tree.

All was well . . . and then a late season storm hit hard. 7" of rain in 24 hours! Fortunately, it has stopped for a while, but more rain is expected tomorrow. The ground has been completely saturated, flash floods warnings were issued, and the risk of mudslides is pretty high. I hope the next storm takes a different route and lets us dry out a bit.

March 17, 2011

Can this Scarf Be Saved??

Unfortunately, my opinion is NO. I know, I spent a lot time knitting this much, but I just have to accept the fact that it's a failure, and rip those stitches out.
It's one of those yarns that have six wonderful (so I thought) yarns on one skein. It looked so beautiful, I just had to make a scarf. How can something so pretty turn ugly so fast? The gauge of every yarn is different and the scarf ended up getting fat and skinny with every yarn change. Some of the yarn is fuzzy like mohair, some is metallic and slender, some nubby and it's all different thicknesses. Somebody told me that I could block it, but they said that sight unseen. I stopped at the Ball & Skein yarn shop in Cambria and saw a scarf knitted with similar yarn, and asked them about it. They said to use size 11 needles, but I'm currently using size 10, so I think 13 might be better. I need advice from any knitters out there.
While I was at the yarn shop, I saw this beautiful yarn, and had to buy it. It came with a free lacy pattern and the owner showed me how to do it. Unfortunately, by the time I got home, I forgot how to do it. Yarn over and knit 2 stitches together. Huh? I couldn't get my needles through 2 stitches no matter how hard I tried.
Honestly, I'm really not good a knitting, but for some strange reason, I continue to torture myself by trying to knit. Every time I begin a project, I have to watch videos on the internet to re-learn how to do it. Then, I start knitting and ripping the project apart at least 6 times. Finally, I figured it out, and I LOVE how it looks.
It would have been a lot faster to crochet it. Hmm . . . buying a scarf would have been really easy. Sometimes, I wish I wasn't so stubborn!

March 15, 2011

Exhibit Opening

Here are some photos of our exhibit at the Faulkner Gallery. Hanging the show turned out to be pretty easy because we met before the exhibit and figured out how the work from 3 different artists would blend together best. In the end, I think we did a great job. This photo was taken right after we finished hanging it.
Ranell forgot to bring one of her pieces (empty space on the right) and she added the title "Conceptualize, Create, Communicate" on the far wall, later in the day. I managed to remember to take a couple of photos during the reception. We had a great turnout and we received wonderful feedback. The most exciting part was that many people had never seen fiber art like this. They were really excited about our work and had many wonderful questions. Here is a photo of Rafael Perea de la Cabada (right), a Santa Barbara artist, and teacher. He's a great source of inspiration and will give me honest feedback about my work. I really appreciate his input.
I also have two pieces hanging in an exhibit at the Jewish Center in Santa Barbara.

March 13, 2011

Soy Wax Results

The paint has cured, the fabric was soaked in hot water and then ironed to release all traces of wax. Here are the results:
Fabric #1: I used a foam stamp for the grid and a cork for the circles.
Fabric #1: Layers of wax and paint

Fabric #1: Wax removed

Fabric #2: I used a foam stamp for the flowers
Fabric #2: Layers of wax and paint

Fabric #2: Wax removed

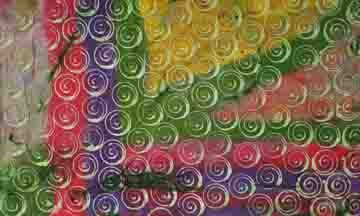
Fabric #3: I used a metal whisk to stamp the swirls.
The fabric looked identical with and without the wax layer. I suspect that because metal is a better conductor of heat, it made a clearer impression on the fabric. This was the final piece, so it's also possible that the wax was warmer.
If you are patient, and let the paint cure for 2 weeks before you remove the wax, very little paint will wash out. Next time, I'll use Dye-na-flow paint instead of Setacolor.
Lots of fun! If you decide to try this, I would love to see the results.

March 8, 2011

Soy Wax Workshop

I have an electric wok that wasn't hot enough for stir frying, but it's perfect for soy wax. I also have a little melt pot and Anne has a crock pot filled with soy wax too. I have tons of stamps, spatulas and found objects that are perfect for stamping.
What is all this for? A soy wax workshop with my Fibervision friends. I gave them the basic information about soy wax and off they went. They grabbed some fabric and tools and got busy.
There are little things you learn along the way about the different tools, but there is very little that can really go wrong. This group doesn't want or need many directions. Even if I told them exactly what to do, they would do whatever they wanted anyways! That's why I LOVE this group!
I really don't like starting with white fabric, so I dunked it into very diluted setacolor (before the meeting) and set it outside to dry. Here's one of the pieces drying in the sun.
This is what it looked like after it was dry. Much better than white.
This is my collection of kitchen tools that I use for stamping. It's amazing how many different mashers you will find once you become aware of them.
Xandra had some pieces that she painted in a different workshop. She brought them along to add a layer of wax and more paint. It looks like she really likes the swirly whisk.
Here's the fabric after a setacolor dunk. Kind of cool!
Here's the same piece after I took a mono print of the surface of my board. Don't you love it?
I'll have more before/after photos to share once my paint has cured.

February 27, 2011

Bizarre Encounter in Cambria

A few weeks ago, Mike and I headed north to Cambria for a weekend getaway. We thought it would be a nice quiet weekend. Ha . . . we couldn't have been more wrong.
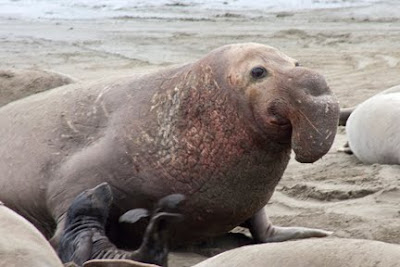
Every year, between December and March, North Beach in San Simeon (just above Cambria), becomes the breeding grounds for Elephant Seals. There is a boardwalk where people can view the seals from a safe distance and docents are present to answer questions.
The largest males weigh 5,000 pounds are are extremely dangerous. They continually challenge each other for breeding rights. The winner of each battle returns to the harem on the beach; the loser is forced to leave.
Their sounds were deafening! Click here to listen. Imagine hundreds of bulls fighting and honking, and mothers and babies screeching (bonding) at each other.
Each female gives birth to one infant, but some will let more than one nurse.
This was the largest baby on the beach, it looked as if it were ready to burst. I think it's safe to say that his mother didn't adopt other infants. Soon it will be on its own, and will need to learn how to fish. Until then, it will survive on the nourishment from the mom.
We spent a several hours watching, and photographing these amazing creatures. It was definitely worth the trip.

February 23, 2011

Tea Fire: Finishing Up

You've seen this piece right after I finished the top. It hung on my design wall, along with many others, waiting for quilting inspiration to hit, but it never hits. I know this. Why does it take me so long to start? Once I start quilting, it goes well enough. I don't understand why I have this block. Deadlines give me a reason to finish. Without deadlines, I would probably have a room filled with quilt tops.
Here's a photo of some of the quilting. I like quilting through two layers, front and batting. If you look real close you will see two vertical areas that aren't quilted as dense. Those areas will contain the final quilting lines.
After the majority of the quilting is finished, I attach a back, then I add the last
bit of quilting . . . just enough to hold the layers together.
This is what the same section looks like from the front. I'll be adding the back tonight and finishing up with the sleeve and label tomorrow night. Almost done with my third fire quilt.