Showing posts with label thermofax screen. Show all posts

January 23, 2017

Results from a Two hour Screen-printing Demo

Last week, I gave a screen-printing and surface design demonstration at the Elverhoj Musuem in Solvang. It was a lot of fun to share some of the techniques I use to color cloth. I generally don't have a preconceived plan. I just let the fabric evolve. Most of the time, it turns out well. Sometimes, it needs more layering. Occasionally, it turn out ugly and you just have to cut it into smaller pieces.

I had a very interested crowd and they had great questions and suggestions. The two hours flew by and only one piece of fabric was fully developed. I let the fabrics batch for 24 hours, added more dye and batched for another 24 hours. I promised to post the before and after photos of the fabric, so here they are along with a brief description of what was used.

Before: Vinyl shelf liner shapes were stuck to a silk screen. Thickened dyes were used to print onto denim fabric.

After: More thick and thin dyes were added. This will become a shopping bag.

Before: Thickened dye was used with a thermofax screen.

After: Thickened gold dye was added.

Before: Thin orange dye was used to stamp the circles. Thin fuchsia dye was sprayed into the center of each circle.
After: I filled the white area with thick green dye.

Before: This started as a drop cloth. I used thick blue dye to screen-print a design made with blue tape stuck to the screen. It turned out pretty ugly.

After: I added more thick gold dye. It's still ugly but I think there is still hope for it.

This is the only piece that was completely finished in one pass. I used sponges to spread thin dye and thick black dye to stamp the ovals.

Of course, I didn't get as much done as I hoped to, so more dyeing was done the next day at home. Thin dye was poured and blended onto white denim. This will become a shopping bag.

This piece was dyed at home. The writing was done on white denim with black dye in a squirt bottle. I splashed fuchsia dye on the background and sprayed with water to blur and blend everything. As it turns out, I like the back of the fabric better. I'm currently making a shopping bag with this fabric. I'll post it when it's finished.

This piece was dyed at home. Blue dye was poured onto the denim fabric. Thickened wasabi and purple dyes were spread around. This will become a shopping bag.

There will be one more demonstration at the Elverhoj Museum on January 28th at 2:00 pm. This one will show you how to Make Stamps. Our exhibit will be hanging until February 5th.

June 6, 2010

O-So Many Layers

The Fibervision challenge is finally complete. Each panel features a piece of fabric that I made using a variety of surface design techniques (screen printing, sunprinting, dyeing, stamping).
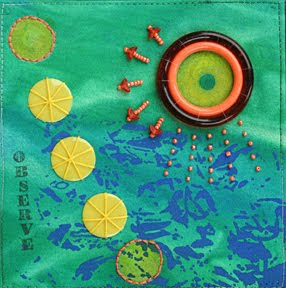
The fabric was wrapped around a square of Timtex and stitched together. Each square is then stitched onto the painted canvas to form the letter "O". Each individual square also contains the letter "O" somewhere on its surface, in some cases, all over its surface.
A plastic bracelet was repurposed by wrapping it in translucent ribbon and stitching it to the Timtex. Screen printing, stamping and embroidery are the main techniques used in the square above.
The base of this piece was sunprinted with green and yellow setacolor and the blue was printed on top using a thermofax screen. The tiddlywinks were used to sunprint and then were stitched onto the surface.
Do you know where the inspiration for your art comes from? Generally, I'm not influenced by other artists work, however, this time, I remember seeing two wonderful pieces of art that influenced the layout of my piece. Perhaps I'm kidding myself, maybe I just don't realize how easily influenced I am. Hmmm . . . something to think about.
Take a look at Michelle's colorful piece. It has 9 mixed media squares on a fabric background. She combines recycled items, text and color in a very fun way.
The other inspirational piece was hanging in a local gallery and was made by Michelle y Williams. I instantly fell in love with it but my husband didn't. Unfortunately, the price tag required that both of us had to be in love with it. It is made from metal squares that have layers of paint and texture applied. Twenty five squares were nailed to a solid base to form a grid.
Are there any truly original ideas left? Probably not many.

February 19, 2010

HP Laptop DIED!

I'll start with an apology because I'm going to vent just a bit. My HP laptop died and I experienced the worse customer service ever. After 30 minutes of customer dissatisfaction on two different occasions with two different tech support reps in India, and numerous requests to speak to a supervisor . . . I give up!
My laptop experienced a major problem that HP knew about but failed to tell me. If HP knows of a problem, they post it on their website, but don't tell the customer. If you happen to find the problem while your laptop is still under warranty, they will replace the motherboard. If your warranty runs out before the issue arises, Tough Luck! The fact that they built a BAD product doesn't seem to faze them. Well, after thousands of dollars invested in the company, I'm done with HP for good. Let the buyer beware . . . they don't care about you at all.
Well, on to a more pleasant and colorful subject . . . this quilt top was just completed. I showed it on my design board a couple of posts ago. It has some hand painted fabric, sunprinted fabric, a thermofax screened print and some fabric that I ran through my inkjet printer. I think I'll make the quilting pretty simple because of all the seams.
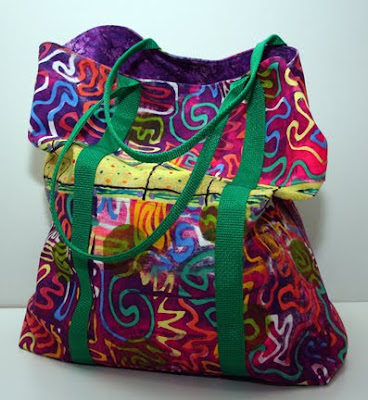
You may recall this fabric that I screenprinted a while ago. I finally made into a tote bag that I use for grocery shopping. I didn't quite have enough, so I painted and stamped the yellow stripe to add in on each side. I love it - it makes me smile.

November 28, 2009

One of a Kind Shopping Bags

My husband and I have decided to be more friendly to the environment. It started by filtering our own water and using a metal water bottle, and then progressed to reusable shopping bags. I really didn't want a bag that said Trader Joe's. I decided to use some of my hand-dyed, painted and screened fabric to make a shopping bag that was truly one of a kind.
I started with a set of instructions that was fairly simple and proceeded to change everything about it. I think the only thing that remained the same was the length of the webbing used on the strap! I kept coming up with a better way to do it . . . I just can't help myself. In the end, it's still pretty simple, but the way it goes together makes a lot more sense (at least to me).
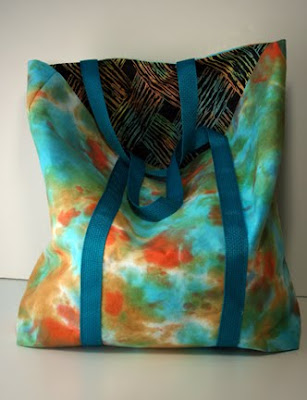
Here's the first bag I made using hand dyed denim on the outside. The interior has a beautiful batik.
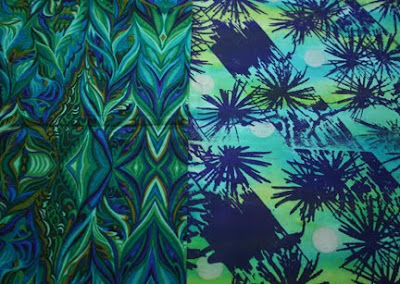
Once my husband saw the fabric combination below, he decided he would also like a special shopping bag. The fabric on the left is a commercial fabric, the fabric on the right was sunprinted, then it was printed using a thermofax screen.

Here's the finished bag. I'm happy to say that Mike loves it!

This is the fabric combination for the next bag. The purple is a commercial fabric and will be used for the lining. The fabric on the right was screenprinted using blue glue on a screen. Once the denim was dry, I added color in some of the squiggles with Dye-na-flow.

Hope those participating enjoyed their Thanksgiving celebration. Two of my three kids came home for a short visit. Although our dinner was delicious, it definitely wasn't traditional. Somehow, all three of my kids turned into vegetarians. One will eat dairy products, one will eat dairy and fish and one is vegan. We decided to have Macadamia nut encrusted Halibut with grilled tofu, home made applesauce, carrot salad, grilled asparagus and stuffing! Everyone was happy and it was wonderful to spend some time together. What more can you ask for?

December 30, 2008

Before and After

I hope everyone had a wonderful holiday. We had a great time with our three kids (young adults). My daughter was on a training trip (swimming) for 2 weeks in Florida, then came to CA for Christmas. Fortunately, she missed all the snow storms in IL. From what I understand, all the melting snow is now causing floods. My youngest son will be moving to Portland in another week, so it's probably the last time we will be together for quite a while :-(
Unfortunately, I haven't been able to do anything too creative during our exterior remodel. It's just amazing how a broken water heater has snowballed into a major remodel. We still don't have plants or paths, however, we do have new stucco, new concrete entrance, new paint, new fence and new gutters. The new stucco on the front walls seem to be dry, so we'll be painting the front today. Once that is done, the plants and paths can be installed. Yeah!!! There is an end in sight.
Here's the before and after view from my front door.We removed a hedge on the right hands side, so we decided to widen the entrance. Here's the new entrance. I was tempted to stick something into the wet concrete, but I was good.

Hmmm . . . this concrete and rebar is pretty interesting. I like the industrial feel and the grid.I like it even more after he contrast was increased. Hmmm . . . should I make this into a thermofax screen? Just goes to show that you never know where you'll find inspiration!

September 6, 2008

Texture Rubbings

At our latest Fibervision meeting, we did rubbings using all types of items. Some of the items used were rubber bands glued onto cardboard, bamboo table runners, hooked rug backing, stamps, rice, hot glue designs, placemats, paperclips, etc. Crayons, Shiva oil sticks, pastels, dye sticks and charcoal are among some of the materials used to produce the rubbings on either paper or fabric. Some of the rubbings looked great with pastel but didn't show at all in crayon. Some looked great on fabric, but awful on paper.These flowers were printed with a thermofax screen on a light, solid colored fabric. There was too much contrast for my liking, so I added multiple colors in the background, and now I like it a lot better.
I'm afraid I really didn't stick to the rules (nothing new there). In some cases, I layered several textures on each piece, so I don't remember what I used on every piece. I had a bunch of "ugly" pieces of fabric that needed a little something, so I used Shiva oil sticks and dye sticks to add a little texture. I used a commercial rubbing plate for the ginkgo leaves above.

I used plastic crewel canvas to rub a bit of texture here and there on this painted piece. I really like the depth it added.