June 5, 2007

Flower Garden

I know it's been a while since I posted, but it couldn't be helped. Mike and I spent every spare minute of the past week planting a flower garden in the front of our house. We worked all weekend and every night after work. I was so tired every night that all I could do was clean up and go to bed. It was so much work, but it was worth it, it looks fabulous!
I love all types of flowers and plants; the colors and shapes really inspire me. I'll post some photos of the new garden next time.

I finally got back into my sewing room last night. Good thing, I was starting to get withdrawal symptoms! LOL.
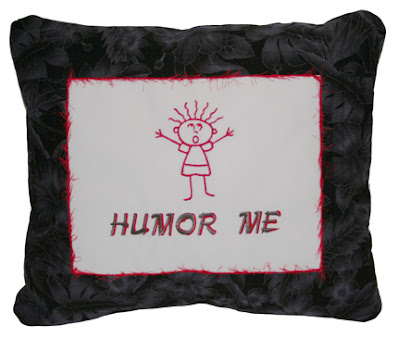
I finished a pillow for my boss' birthday. She has everything imaginable, so it's always a challenge to give her something special. She loves art and has a good sense of humor. She frequently says "Humor Me", so I decided to incorporate the saying into a pillow. I think (hope) she will get a good laugh!

May 27, 2007

Fibervision

Several people have asked about Fibervision, so here is a quick description.
There are 26 active members that live in CA within 150 mile radius of each other. We rent a room once a month at a community center to plan/discuss exhibits, art topics, share finished work, seek advice and play. Each month one or two of the members shares a technique or knowledge with the rest of the group. The talent and expertise within this group is amazing. I am very fortunate to be associated with such a wonderful group of artists. They are always a source of inspiration. Visit our website at www.fibervision.org
This month Michelle brought pigment based dyes and Cathi brought fiber reactive dyes for us to play with. Wow, did we have fun. Most people dyed cloth, Joan overdyed rusted cloth, Kristin brought a rayon shawl and Diana brought a silk tank top .

This photo shows the results I got with the dye. Left to right: White on beige, white on white, the next 3 were black and white and last one was a pink, beige and cream stripe. My favorite is the white on white/beige pieces.


This photos shows three pieces that were painted with the pigment dye. This pigment dye is very bold, the colors are much stronger than the dye-na-flo or setacolor that I am used to. I love them all.

May 24, 2007

Spring of Creativity

Here's my second challenge quilt for The Artist's Muse group. The chapter discussion was Spring of Creativity.
The individual challenges were as follows: create a piece to depict flowers on a pieced green background using 3 or more green fabrics using a repetition of one to three shapes and then add some punch to your design by adding one unexpected shape or color to create an off center focal area.

Do you think I met the challenge??

The background is a lot of chopped bits of fabric, thread clippings, avocado bag pieces and fuzz balls from the cut end of newly washed fabric. It was all layered in between water soluble stabilizer and stitched like crazy. After the stabilizer was dissolved, the piece was stitched to an irregular background. I was inspired by the amazing ice plants that bloom every spring outside my sewing room (see the post on Mother's Day). The three-dimensional construction is very simple, but effective. Basically, it is a strip folded in half, gathered and clipped. I had a difficult time getting the butterfly embroidered just right. You can see from my last post, I used a different butterfly. As expected, the first one was way too big, the second one wasn't sturdy enough to stand up, but the third one was just perfect!
This challenge was a lot of fun and I'm really pleased with the results. I'm thinking that I will mount and frame this piece somehow. It is fairly thick, three-eights of an inch, and pretty heavy. I would like to hear any suggestions you might have for framing.

May 19, 2007

Sneak Peek

I'm working on the second challenge for the Artist's Muse group. Below is a photo of a butterfly that I may use in my piece, but it may be too large. I guess I'll decide when it is finished.
I should be able to leave and work on something else why the machine is stitching away, but it's always so fascinating to watch the design develop, I can't leave. This photo is showing you how much detail is added on the last color pass. The left side is completely finished.

May 13, 2007

Happy Mother's Day

I hope you have a wonderful day! I thought I would share some flower photos with you. Enjoy.


May 12, 2007

New ATC's

It's a lot fun to get to know other artists and trade these little cards. I must say, it is getting addictive! I like to try a new technique each month.

My card is at the top left. It's the one that looks like a paint splotch. The bottom layer was marbelized, the 2nd layer was screen-printed and the top layer was added with marker.

May 10, 2007

Painted Fabric

As promised, here are a few of my favorite pieces of fabric that I painted yesterday. It was so much fun to make and I love the way it turned out.
I used 5 colors of transparent Setacolor, 2 yellows, green, blue-green and red, each diluted to a 50/50 mix of paint to water. I sprayed the fabric with water until it was damp, but not dripping wet. I used a clean foam brush for each color. I Laid the colors on from light to dark. The amount of paint you lay down in an area will determine the darkness. If you space the colors farther apart, they will blend together like a watercolor painting. Choose your colors carefully, or you could end up making yucky brown!
This piece has 2 yellows, green and blue-green. I placed washers on top as a resist.
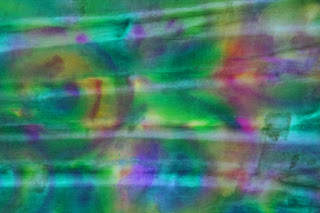
Circular shapes were painted using all five colors.

This piece was painted in bands with 2 yellows and the red.

May 9, 2007

The Perfect Day

I work late quite often and have many comp hours built up. So, I decided to take the day off today and do whatever I wanted. I didn't do any laundry or dishes; I didn't even make the bed! I spent the morning taking photos and this afternoon I painted a yard of white fabric I found when I cleaned my studio. Then I met with my ATC group and exchanged some great cards. Mike and I went to the beach and ate dinner. It was a perfect ending to The Perfect Day.
My next post will have photos of the fabric and cards.
Terri, from Stegart asked for a closer look at the flower quilt on my design wall. It isn't quite finished, but is very close. When I started this drawing, I was thinking of how nature appears to a small bug on the ground.

The background fabric was painted very lightly with dye-na-flow, then the flowers were painted using dye sticks and water soluble crayons. The background texture was created by rubbing dye sticks across the fabric with plastic canvas underneath. The bee and butterfly were embroidered on my Viking.

May 7, 2007

My Sewing Studio

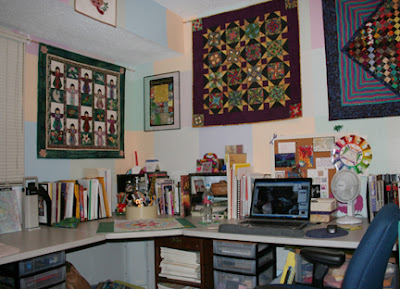
Well, my studio was such a disorganized mess, it was long overdue for a good cleaning. I spent the last two days re-organizing everything. What a difference! It is so neat now, I can find everything instantly. I can't wait to get to work and mess it all up again. LOL

This is the area where I do most of the cutting and ironing. There is my beloved HP laptop. This was my Christmas gift from Mike. At the time, I didn't realize how much I would love it.

This is my main sewing machine, a Viking Designer I. I love, love, love this amazing machine, it doesn't just sew, it purrs its way through every project I take on. I have a flannel design wall hanging in front of the closet. Behind the curtain are many shelves with all sorts of fun materials waiting to play. Whenever I run across a good sale, I will buy several yards, and hang it on hangers in the closet. Not shown are quarter to half yard pieces, they are stored in drawers, sorted by color family.

This is my wall of fabric. One to two yard lengths are rolled up, tied and stored on end on these shelves. They are sorted by value, but I can see in this photo that a few pieces are out of place. Oh well, that will have to wait for another day!
April 29, 2007

New Blogger Heading

Just posted a new graphic heading on my blog. I couldn't find any instructions on what size it needed to be, so it was a matter of trial and error. It took four times to get the size correct. So, what do you think? Do you like it????

April 28, 2007

Friendship Mandala

I recently joined a Yahoo Group to discuss and explore the book The Artist's Muse by Betsy Dillard Stroud. Sue B and Joanna are the moderators of this talented group.
While everyone was waiting for their book to be arrive, we were given some general guidelines to use in creating our personal mandala. Generally mandalas contain a lot of symbolism and meaning to the maker.
We each chose a subject and explored our personal symbols and the meaning of colors to express our topic. My mandala, below, is based on friendship.


I am the small blue (loyal) circle in the center surrounded by the friendly (orange) circle. The pink (loving) open hands are a sign of welcoming. My friends are represented by the blue (loyal) stylized figures in the outer circle. The quilted spirals represent femininity and fertility. The yellow (happy) circles symbolize infinity, eternity. I have used circles in my artwork for many years, so the circular mandala was a very comfortable shape for me to work with. However, packing so much meaning into every section was quite the challenge.
I started with a bluish-yellow piece of hand-painted fabric for the background. I cut the hands out of organza with a hot pen tool which fused the edges. I laid them out to determine how large the circle needed to be. I then made a stencil out of freezer paper for the stylized figures. I used dye sticks throughout the piece. The red and yellow circles on the outside edge were made using tissue paper that releases its dye when wet.
The final piece was quilted. It measures 17" square.

You can view all the mandalas at http://webpages.charter.net/sbleiweiss/muse/mandalas.htm

April 26, 2007

Fun with Photos

I really enjoy photographing nature. It's always fun to play with Photoshop to see what happens. Sometimes, an interesting photo becomes spectacular with the help of a few filters.
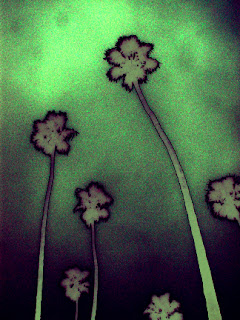
These palm trees were shot on a very cloudy day. It created a very moody, almost eerie feeling.

This is a photo of a flower on a Lily Tree. The flowers are around 12" long. I tried growing one in my yard but didn't have much luck.

This is a close-up of a Canna leaf. The colors and stripes are magnificent, I love them the way they are.