
 This is the "Before" Photoshop manipulation photo. It is a metal grid that holds a large outdoor light in a parking lot. I was instantly attracted to the linear graphic pattern. There is no telling what I will stop to take a photo of. I'm sure many people think I'm a bit strange! LOL
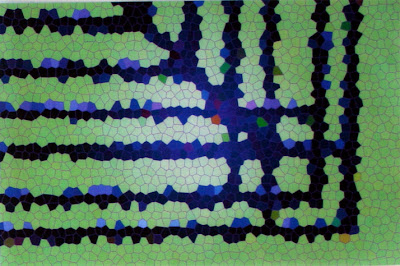
This is the "After" Photoshop Manipulation photo. It still has the same basic structure but I think it's more exciting. Here's how I did it, more or less. Keep tweaking the numbers until you get the effect that works best for your photo.
1. Choose Layer/Adjustment Layer/Color Balance and move the sliders until you get a color you like. You can select different color combinations for the Shadows/Highlights/Midtones.
2. Make sure your background layer is highlighted. Select Filter/Texture/Stained Glass. Move the sliders for different effects. Smaller cells will result in an image that resembles the original. Larger cells will be very abstract. Here are my parameters: cell size: 7, border thickness: 4, light intensity: 4.
3. Choose Layer/Flatten Image/Save As: jpg. If you want to save as a Photoshop file, do not flatten image.
Make sure you play with all the sliders and try to keep notes on the effects you like. Otherwise, you won't remember how to do it again! Hope you find this helpful.


