Showing posts with label surface design. Show all posts

January 18, 2014

Digital Collage

Digital collage is the perfect way to combine mediums. You can create your image entirely on the computer OR you can dye or paint the background then put it through the printer to add the final digital image OR you can print the digital image on the fabric and then add to it afterwards with screen-printing or stamps. There is no right or wrong way and it's fun to try them all to see what you like best.

I love photography and I take a lot of photos. See me in the shadow?


One of the best things about digital photography is the trash can. You can take a zillion photos and if they don't work out the way you planned, delete them. I think a lot can be learned by trial and error and I never shy away from an experiment; sometimes the experiment yields the best result.

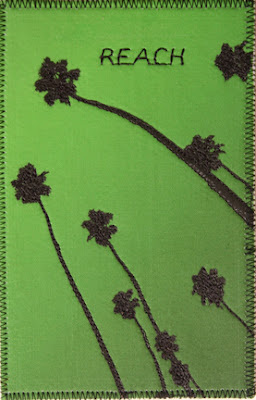
I've always been intrigued by the branching structure of trees. Once the trees lose their leaves I grab my camera and start taking photos. I really love the lines and shapes created by the branches but I thought it had potential for something even better.

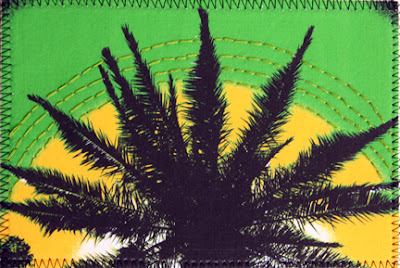
This is how the photo looked straight out of the camera. Yes, the sky really is that blue. We are having record breaking warm winter in southern California and could use a lot of rain.
This is what the branches looked like once I converted the image to black & white and removed the background. There are several ways to remove the background, but I like to use the magic wand and the background eraser.


Here are the branches inserted onto two different backgrounds. Both are lightened photos of my hand dyed fabric. Doesn't the branch look much better on beautiful background?

I've been playing around with several ideas of how I could incorporate line into my work and this type of exercise is helping me sort though my thoughts.


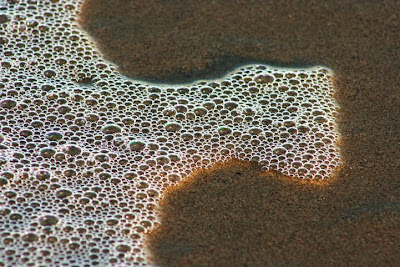
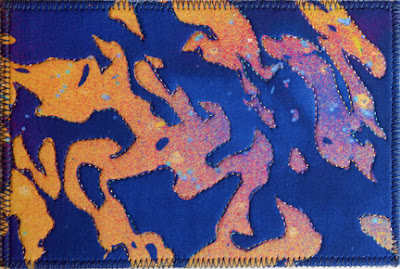
Final Question: Is this a photo of something that exists in the natural world OR is it a photo of fabric that has been painted, dyed and/or manipulated in some way?

April 25, 2010

Still Stitching and Embellishing

As you can see from the photo below, I'm still stitching and embellishing. This mat and metal trays help control my beads. If you spill a container of beads, you'll be picking them up for the next 2 years. Not much fun! Do you have specific tools that make your beading easier?
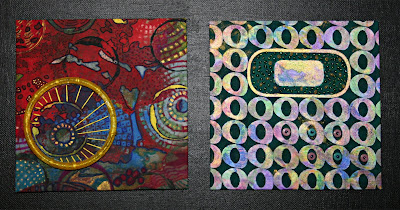
Here's the final square for the letter "O" challenge. I didn't finish in time for the Fibervision meeting, but I faked it pretty well. Each square was attached to the canvas with two applique pins. My first attempt with blue tape attached to the back didn't work because the squares were too heavy. Once I finish the embellishment on this square, I'll stitch them all to the canvas background.
Everyone loved my piece and thought it would make a great sample for teaching surface design. I tend to underestimate the amount of information I have and think that everyone knows what I know. My friends keep telling me that it's not true, I have a lot to share and should teach. Teaching is something I would like to do, but at this point in my life, I don't have enough hours in my day.
I love the texture in this sea foam along the beach. I use circular or pebble quilting quite often and find that the size variation of the bubbles is what makes it interesting. I recently saw a quilt where all of the bubbles were the same size and I didn't care for the way it looked. IMHO, Size does matter! LOL

April 18, 2010

Progress . . . Inside and Out

It was a good weekend . . . my "To Do" list is definitely a little shorter. The long days and warm temperatures really make the flowers bloom. Here are a couple of close ups of flowers in my garden.
Nothing like a beautiful Gerber Daisy. They are easy to grow and seem to live forever.
This is an Angel Trumpet Tree. Right now, it's around 5 feet tall, however, they can grow up to 15 feet tall.
Here's a couple of finished panels for my Fibervision challenge. Will it be finished by next weekend? I'm not sure. I still have to finish two panels and attach them all to the black canvas.
The fabric and embellishments in each panel is completely different, however, each has layers of paint, dye or marker. They have been rubbed, screened, scraped, sun-printed and bleached. There is quite a bit of hand stitching, lots of beads and some re-purposed items attached.
With any luck, I'll have a photo of the finished piece ready for the next post. Stay tuned!

July 16, 2008

Surface Design on T-shirt

Shhh . . . don't tell anyone, but I can be really sloppy. It seems like I'm constantly getting stains on my shirts. I'm tired of throwing out perfectly good shirts, so I got creative with some surface design.I decided to hide two little stains smack in the middle of the shirt with some writing. I guess I got a little carried away. Now, I'm going to add more layers with transparent paint. Can you see the stains? Hope not!

Here are some of the beautiful ATC's I received at our last trade. Lucilla (top left) used real clothes pins on her card and Louise (bottom left) stitched her cat using black thread. They are all so beautiful and creative.

February 24, 2008

Photoshop Manipulation

These postcards were made from photos that were manipulated in Photoshop. I printed the tweaked photos using my inkjet printer and pre-treated cotton fabric from Jacquard. These are going to be traded with members of the Surface Design group. It's a lot of fun playing with Photoshop because you're never quite sure what your image will end up looking like. Hope they like them!

November 13, 2007

Photoshop Fun

I belong to an online Surface Design group that does a lot of trades. Joanna organizes many trades between wonderful artists throughout the world. I work too much and don't get enough play time, so I'm really careful how many trades I sign up for. Sometimes, I just can't resist, and this is one of those times. This postcard trade is going to be using Photoshop manipulated designs. Here's one example of what I'm playing with. Let me know what you think.
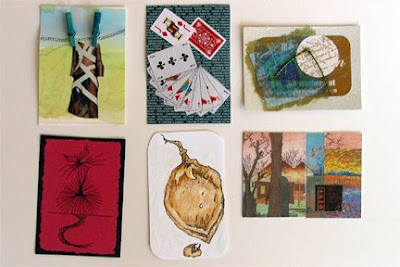
This is the "Before" Photoshop manipulation photo. It is a metal grid that holds a large outdoor light in a parking lot. I was instantly attracted to the linear graphic pattern. There is no telling what I will stop to take a photo of. I'm sure many people think I'm a bit strange! LOL


This is the "After" Photoshop Manipulation photo. It still has the same basic structure but I think it's more exciting. Here's how I did it, more or less. Keep tweaking the numbers until you get the effect that works best for your photo.

1. Choose Layer/Adjustment Layer/Color Balance and move the sliders until you get a color you like. You can select different color combinations for the Shadows/Highlights/Midtones.

2. Make sure your background layer is highlighted. Select Filter/Texture/Stained Glass. Move the sliders for different effects. Smaller cells will result in an image that resembles the original. Larger cells will be very abstract. Here are my parameters: cell size: 7, border thickness: 4, light intensity: 4.

3. Choose Layer/Flatten Image/Save As: jpg. If you want to save as a Photoshop file, do not flatten image.

Make sure you play with all the sliders and try to keep notes on the effects you like. Otherwise, you won't remember how to do it again! Hope you find this helpful.

July 7, 2007

Beautiful Postcards Received

Here are two postcards I received from the Surface Design Color Composition trade.
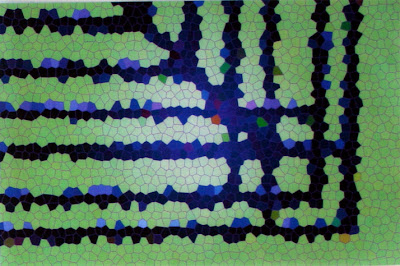
This one is made by the incredibly talented Joanna. I love the complimentary colors she used. Visit her blog to see more of her fabulous work. This beautiful postcard is made by Jan Z. As far as I know, Jan doesn't have a blog or website. Correct me if I'm wrong Jan. I love all the different purples in this card. Jan also incorporated some purple yarn for additional texture.