May 27, 2014

The Final Layer of Paint!

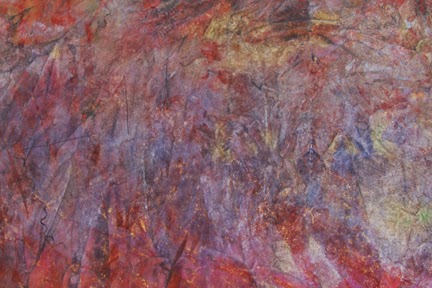
I'm finally happy with the results of painting experiment. I would do this again, but I would skip the  pounding and go straight to the painting. I definitely prefer knowing that my fabric has paint on it. Just so you know, this method produces a fairly stiff fabric that feels a bit like paper, but you would still be able to stitch through it.

Keep in mind that that the beauty of the iridescent paint is very difficult to capture.

Fabric 1
front
back

Fabric 2
front
back

Fabric 3
front
back

Fabric 4
front

The back side of Fabric 4 stayed the same.

You can still see a hint of some of the underlying images but I covered them up pretty well. Right now they still have quite a few wrinkles. I'll let the paint set for a full two weeks, then give them a good steaming to remove the rest of the wrinkles. I'm planning to store these pieces rolled instead of folded.

May 26, 2014

Exhibit at Cabrillo Pavilion Arts Center

Fibervision is having an exhibit at the Cabrillo Pavilion Arts Center in Santa Barbara from May 28- June 22, 2014. The opening reception will be on Wednesday, June 4th from 5:30 - 7:30 pm. If you're in town, please stop in for a visit. See the flyer below for all the details.

Here's a couple of close up shots of the quilting on one of my new pieces. It showcases the same "skylight" fabric that is used in the piece on the flyer above. Photos were manipulated, then printed on fabric. I also have a third design in progress that uses the same fabric.


I used plastic circle templates to help me quilt five sets of gradated circles, then I stippled around the outside to flatten the background.


Once the CPAC exhibit opens, I'll show you the entire quilt.

May 18, 2014

More Pounded Fabric

Here are the final two pieces from the Pounded Fabric experiment. Sometimes the best lessons are learned from your failures. This experiment is one of those lessons!

Fabric 3
 This is a fat quarter that somebody else dyed as part of an exchange. Not my style.

Not much better after the Setacolor and Lumier layer.

Front side. Another layer of Neopaque and Lumier. You can still see the stamped designs.

Back side looks a lot better than the front.

Fabric 4
I'm responsible for this piece. It has layers of rubbings with paint sticks. It's pretty bad.

 A layer of Setacolor and Lumier help, but it's still ugly.

Front side after another pounding with Neopaque and Lumier.

 The back side of this piece is probably the most interesting of all.

I like the combination of Neopaque and Lumier paint, however, I don't like this pounding technique. If I were to do this again, I would paint the damp fabric, then scrunch it into a bag to dry. At least I would know beforehand that all the areas that needed paint received it.

I'm not quite ready to give up yet and will do one final coat to all the pieces using my technique. I want majority of the underlying designs to disappear. Before I do the final layer, I need to finish the quilting on a piece that will go on exhibit at the end of May. 

May 16, 2014

Pounded Fabric Experiment

I read a blog post about Pounded Fabric and decided to give it a try. Of course, I didn't follow all of their directions. Silly me . . . will I ever learn? Probably not.

If I had started with a solid color of fabric like they suggested and didn't use transparent paint for the first layer, I would probably be done already. But no, I had to use some really UGLY fabric that I've been saving for some odd reason. Usually, layering makes the fabric more interesting. At this point, I'm not convinced that I should have wasted my time.

There are a lot of step by step photos so I'll only show 2 pieces of fabric today.

Fabric 1
 Hand dyed fat quarter. Not sure who made this, but it's not my style.
Squished fabric into a bag and added transparent Setacolor and Lumier paint. Still ugly
Squished fabric into a bag and added Neopaque and Lumier paint.
I still see the stamped design on the front side of fabric.
Back side of fabric . . . much better, but not great.

Fabric 2
All the steps are the same as Fabric 1.
I made this ugly fabric a long time ago using Soft Scrub with bleach.
 Setacolor made it worse.
 Front of fabric is still ugly.
Back of fabric is still ugly.

Am I completely wasting my time? Should I throw it away OR add one more layer?

May 7, 2014

Hand Dyed Fabric

The weather has been warm here which is perfect for dyeing. I like to dye outside on my patio. I get to play with color and enjoy nature. It doesn't get much better than that!

The top four pieces are fat quarters of Sateen.


The three pieces below are fat quarters of Broadcloth.


 If you love hand dyed fabric, take a look at my Etsy site to see what I have available.

May 2, 2014

Ready for Quilting

I tested my flower pin and foam basting creation on three 8 x 8" quilts and they worked well. I was pleasantly surprised at how quick and easy it was to pin the layers together.

So now I pin basted a small and medium sized piece and will quilt them to see if the pins actually stay pinned for the duration of quilting. That seems like an important feature, don't you think?
Here's the first piece that I'll quilt. It's around 16 x 20".

If the smaller piece goes well, this one will follow. It's around 35 x 40".

I have about 200 of the foam pieces cut, but only had 95 pins in my stash. If the pins hold well through the next test, I'll have to buy more pins. Even though the pile looks large, they are extremely lightweight, lighter than the safety pins I use now.