
How did you promote your art?
What did you do to enhance your online presence?
What technological skills did you learn or improve?
How many people did you add to your mailing list?
Who were the top ten cool or influential people you met?
Did you create a new business card, portfolio, or other marketing piece?
What medium or skill did you attempt or master?
What did you try that was completely new?
What did you try that was uncomfortable, but helped you grow?
What new art events, galleries, and museums did you visit?
What resources did you discover?
How did you improve your studio habits?
What books did you read to help your career?
What seminars/workshops/lectures did you attend?
What organizations were you involved with?
What grants/honors/awards did you receive?
What articles were written about your work?
What submissions did you make?
Where did you save a wad of money?
What was the single best thing that happened to your art career in 2007?
Jewelry Pouch
I gave my daughter some jewelry for Christmas and then realized that she was dumping it into a plastic bag. So the day after Christmas she picked out three different fabrics from my stash and I made her this jewelry pouch. I've made quite a few of these over the years, so it went together pretty quickly.
 Here you can see that there are eight individual spaces to keep your jewelry separate so you don't end up with a giant jewelry ball. You can also store larger pieces in the base of the pouch.
 This is Lora's beautiful painted fabric. We think the fabric is
 My paint was diluted with more water for this one. As you can see the final effect is lighter. I used Kaufman
  Nicky Claus! I cracked up and ran to get my camera. Nicky is the sweetest poodle I ever met. He had special training so he can visit people in hospitals and nursing homes. I'm sure this little
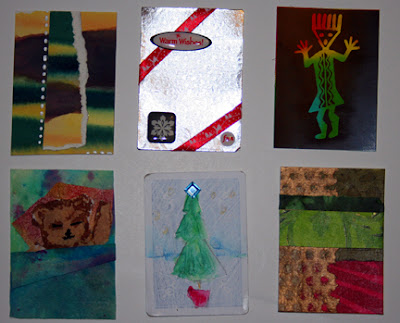
 Yippee, my studio is compete! Here is a photo of my Viking Designer I in its new home. It's amazing how comfortable it is to sew at this height. The first thing I sewed was the hem on my husbands shorts because he threatened to leave a nasty comment on my blog if I didn't fix them soon. Then I made a postcard out of the leftover coaster fabric.
 My sewing table backs up to an L shaped table, so I will have a huge working surface for large projects. I think I could have 3 people working fairly comfortable in this space. I'll have to test that theory out soon.
 This shows the L shaped table from the opposite direction. You can see my laptop in the
  Here's the other end of the L shaped desk. There is a ton of storage underneath and behind this area.
 I found some fabric that I won't use and will donate it to a local group. After organizing everything I have one empty shelf that will hold a large bin for leftover scraps. Thanks to my interior decorator friend, Nancy, I still need to find a way to store approximately 25 pounds of upholstery fabric.
 This is what it looked like after I printed it on treated cotton fabric.
  I added a layer of
  I cut four circles from the piece and stitched around the perimeter of each.

 You can see most of the fabric wall in this photo, each rolled up piece is at least one yard. The larger pieces are in the closet, which are also being rolled up. This was taken before everything was put away. It's much neater now.
 Here's a close up of my fabric wall. The fabric is rolled up, jelly roll style, tied and stored on end. This wall of fabric always makes a BIG impression with visitors.
 The oak unit is packed with one-half yard pieces of fabric. Each drawer holds a different color and the large drawer on the bottom has a lot of hand painted/dyed/discharged fabric. The plastic drawer unit also has fabric and stabilizers and there are more bins under the table!


 My fabric sample and strip is the first one shown above; orange background with a green and blue cross. The fabric has many colors, all very bright.
 It has been a long time since I pieced a traditional block. There was a lot more precise measuring and stitching than I remembered!
 We actually did the exchange earlier today. I'll take some photos tomorrow and show you all of the strips I received. I knew my fabric was bright, but I was surprised just how bright the finished strips were. They are great and I love the way they turned out.


