October 27, 2014

Quilted Texture

Texture is a big part of why I quilt and I spend a lot of time (probably too much time) considering how to quilt each piece. As I was quilting this piece, it just really struck me how different the stitching made it look. I had to stop and take photos and want to share them with you. I have known this for a long time, but to look at the before and after, really proves it.

I like the texture that the purple circle add to the background.

 The swirling inside the ovals make them recede and add interest.

I feel like I'm a pretty good quilter, but there is always room for improvement. Sandwiched between a trip to Las Vegas and Spain, I took a 5 day HQ quilting class at the Creation Station with Pam Clarke and Megan Best. It covered a variety of skills ranging from traditional patterns to overall designs, many of which I never would have tried on my own. The scale of most designs were larger than what I was used to. Needless to say, I was definitely pushed out of my comfort zone. It was a good experience and a good confidence builder.

October 6, 2014

Final Quilting Decision

I'm about to quilt the final section of the sky and I'm trying to decide what color of thread to use. Yesterday, I thought I was going to use ice blue thread, but today it isn't even a contender. Between the three colors shown, iris (darker purple), blue and amethyst (lighter purple), I'm leaning towards the iris. I think I'd like to darken up this area a bit and the purple would do that and add a little warmth. Which one do you like best?


I can't show you the whole quilt yet because it's going into an exhibit soon, but I bet you can guess what it is. Here's a close up of some of the quilting on my hand dyed fabric. Hope you can see it, the thread color blends pretty well.


I've been using my homemade pinmoor holders a lot and I absolutely love them. They stay in pretty well even through all the shifting, rolling and scrunching that you do while quilting, but they're easy to remove when you pull on the foam. I purchased extra pins and have about 120 now.

October 1, 2014

Fantastic Summer . . .

So many wonderful things have happened in such a short time. It seems like I've been running from one  thing to another with little time in between. Now that I've had a little time to catch up, I'll work backwards through some of my summer adventures.

The most exciting part was a trip to Morocco and Spain! The whole trip began because my husband had to go to Marrakech for business; so we decided to make a vacation out of it. We spent a week in Marrakech at the Palmeraie Palace and then went to Spain for two weeks. It was a fantastic vacation, much better than I ever imagined. The Palmeraie was a beautiful resort on the outskirts of Marrakech. They had everything you could want, great restaurants, spa, pool, shopping and golf. They took credit cards, the food was safe and delicious and they gave us bottled drinking water, remember this is Africa and we had to get Typhoid shots.

Back of the Palmeraie Palace and lake

Palmeraie Palace has the largest golf course in Africa

Ornamental cutouts in the hallways

Great tile work in lobby

Beautiful pool and lush tropical setting

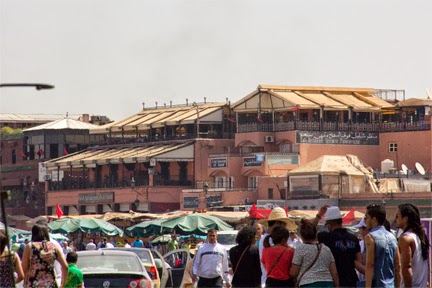
As beautiful as the resort was, it wasn't the reason I was there. It was time to discover the real Marrakech. I hopped in the hotel van that dropped guests at the Medina in the Old City. Wow  . . . now this is different! What an odd mix of ancient customs and modern conveniences.

Donkeys, horses, cars, pedestrians, camels, bicycles and motorcycles all share the road.

Odd Couple

The Old City is where you want to go for people watching and shopping (haggling) in the souks. If you don't haggle, you will end up paying way too much for everything! The souks (marketplace) isn't for the faint of heart, however, it's an experience than shouldn't be missed. Be prepared to get lost and be prepared to pay a guide to lead you out of the miles of maze like tunnels. At one point during a haggling session for a camel backpack, the Berber salesman stopped and asked me if I was part Berber. Apparently, that was a compliment because I ended up getting the backpack for the price I wanted.

The Medina is quiet during the day but the snake charmers come out at night.

One of the tributaries leading into the Souk.

Storefront in the Souk.

Olive Stall

Dyer's Souk (red dye day)

Natural Dyes, Pigeon poop is used as a discharge agent

Door in the Souk

Changes are happening quickly and you can almost feel the growing pains. We discussed the construction of the New City with a local. He said that it didn't exist until 2000 and now they have high rise apartments and shopping centers. The cost of living has risen considerably and he was having a hard time making ends meet. Needless to say, he didn't like the changes but that's the way most people feel about change everywhere.

My opinion: They could use some traffic lights and rules. Their controlled chaos way of driving leaves a lot to be desired.

June 11, 2014

Gelatin Plate Printing . . . The Results

This shows most of the pieces I printed on my first day with my permanent gelatin plate. None of these pieces were plain white fabric when I started. All of them had some sort of surface design and I didn't like the way any of them looked. The gelatin printing has improved all of them.

The blue trees and frame used to be beige and the mottled green was a solid bright apple green.
It used to be really ugly, now it looks kinda aged.

I ripped three sections of this fabric apart to print it on the gelatin plate. It has had everything you can imagine done to it. It was rusted. stamped, printed, rubbed with oil stick. screen printed, painted and now printed using the gelatin plate. 

I don't love it, but I l do like the light in this piece.

I like this piece but I think it needs more. The bottom layer is dyed but it isn't very interesting. The gelatin print helped it tremendously but it needs at least one more layer and more color.

I love this one. The bottom fabric was painted with Setacolor.

I love this one too. The bottom fabric was painted with Setacolor.

I've tried a few different types of textile paints and so far I like thin, transparent paint best. Please leave comments and let me know what has worked for you. We learn from each other!

June 8, 2014

Permanent Gelatin Printing Plate

I've used gelatin plates for printing in the past but I haven't had a lot of luck with them. It seems like they get warm really fast and needed to be refrigerated often. I didn't even get the process fully figured out before the plate fell apart. I read about somebody (sorry, can't remember who) that used glycerin as a preservative in a gelatin plate and it worked well. The printing plate did not need refrigeration and it did not mold. I saved the information - just in case.

Fast forward . . . Gelli Plates became popular and I became tempted to buy a large one, but then I remembered that I had a recipe for a permanent gelatin plate and I decide to give it a try. I ordered the glycerin from Amazon and searched for the perfect cookie pan. Once the glycerin arrived, it was really fast and easy to make.

Small Gelatin Plate Recipe:
2 TBS Gelatin
1/2 cup Glycerin
1/2 cup Boiling Water

Large Gelatin Plate Recipe:
12 TBS Gelatin
3 cups Glycerin
3 cups Boiling water

1) Mix the gelatin into the glycerin
2) Add the boiling water. Stir until dissolved
3) Pour into the pan and level
4) Let harden at room temperature

Gelatin from grocery store and vegetable glycerin from Amazon

Small Plate: Use a shallow container. Once gelatin is set, flip it over and remove the gelatin. Keep it stored, upside down on the lid so it can be used easily.

Large Plate: Use the Large Recipe or calculate how much gelatin your container needs to fill to the brim. I leave the gelatin in the pan even while printing. Make a cover for the pan to protect the gelatin. If the plate gets damaged, cut it up and put it in a microwavable container, melt it, then pour it back into the pan.


10" x 15" shallow cookie pan, filled to brim with gelatin

DO NOT clean up in your sink or you will clog your pipes. Wipe up the gelatin with paper towels and throw away. Rinse with hot water outside.

I've tested my plate already and it works great. I'll post photos in a couple of days.

June 3, 2014

Taming of the Threads

I'm happy to report that I was able to tame all the threads and managed to turn the fabric into a functional book cover. Much better than the store bought purple plastic binder, don't you think?

 Here's the front. It's really reversible, but I like this side best.

 I folded the flap fabric and stitched the raw edges into the outer edge. The binder slips right in.

Here's the back of the binder.

I went around the outside edge with two rounds of satin stitch. The first time was the middle setting on my machine and the second time was the widest setting. It turned out slightly wonky which feels just right.

June 1, 2014

Thread Fabric for a Guest Book

Fibervision just switched its guest book to a 3-ring binder format and I decided to make a book cover to jazz it up. To make the fabric, I'm using all the bits and scraps that "normal" people throw away. It has the thread tails, thread snots as I like to call them (knotted threads from fabric ends after washing), bits of fabric scraps and left over yarn. I arrange the bits on a fabric background until I like the arrangement, cover it will Solvy and stitch like crazy.


I've used this technique before but I've always mounted the finished pieces onto canvas or postcards. This will be the first time that I've created something functional with it. The fabric was wet and in the process of being blocked when I shot this photo. I underestimated how much shrinkage would occur and I have just enough fabric to cover the 3-ring binder.


Now I need to cut it to size and figure out a good way to secure all the loose threads. I think I'm going to go around with a couple rows of straight stitch, then do a wide satin stitch. Somehow, I'll have to attach pockets to each end too. Hopefully, it all works out because I don't have any time left for a redo.

May 27, 2014

The Final Layer of Paint!

I'm finally happy with the results of painting experiment. I would do this again, but I would skip the  pounding and go straight to the painting. I definitely prefer knowing that my fabric has paint on it. Just so you know, this method produces a fairly stiff fabric that feels a bit like paper, but you would still be able to stitch through it.

Keep in mind that that the beauty of the iridescent paint is very difficult to capture.

Fabric 1
front
back

Fabric 2
front
back

Fabric 3
front
back

Fabric 4
front

The back side of Fabric 4 stayed the same.

You can still see a hint of some of the underlying images but I covered them up pretty well. Right now they still have quite a few wrinkles. I'll let the paint set for a full two weeks, then give them a good steaming to remove the rest of the wrinkles. I'm planning to store these pieces rolled instead of folded.

May 26, 2014

Exhibit at Cabrillo Pavilion Arts Center

Fibervision is having an exhibit at the Cabrillo Pavilion Arts Center in Santa Barbara from May 28- June 22, 2014. The opening reception will be on Wednesday, June 4th from 5:30 - 7:30 pm. If you're in town, please stop in for a visit. See the flyer below for all the details.

Here's a couple of close up shots of the quilting on one of my new pieces. It showcases the same "skylight" fabric that is used in the piece on the flyer above. Photos were manipulated, then printed on fabric. I also have a third design in progress that uses the same fabric.


I used plastic circle templates to help me quilt five sets of gradated circles, then I stippled around the outside to flatten the background.


Once the CPAC exhibit opens, I'll show you the entire quilt.

May 18, 2014

More Pounded Fabric

Here are the final two pieces from the Pounded Fabric experiment. Sometimes the best lessons are learned from your failures. This experiment is one of those lessons!

Fabric 3
 This is a fat quarter that somebody else dyed as part of an exchange. Not my style.

Not much better after the Setacolor and Lumier layer.

Front side. Another layer of Neopaque and Lumier. You can still see the stamped designs.

Back side looks a lot better than the front.

Fabric 4
I'm responsible for this piece. It has layers of rubbings with paint sticks. It's pretty bad.

 A layer of Setacolor and Lumier help, but it's still ugly.

Front side after another pounding with Neopaque and Lumier.

 The back side of this piece is probably the most interesting of all.

I like the combination of Neopaque and Lumier paint, however, I don't like this pounding technique. If I were to do this again, I would paint the damp fabric, then scrunch it into a bag to dry. At least I would know beforehand that all the areas that needed paint received it.

I'm not quite ready to give up yet and will do one final coat to all the pieces using my technique. I want majority of the underlying designs to disappear. Before I do the final layer, I need to finish the quilting on a piece that will go on exhibit at the end of May. 

May 16, 2014

Pounded Fabric Experiment

I read a blog post about Pounded Fabric and decided to give it a try. Of course, I didn't follow all of their directions. Silly me . . . will I ever learn? Probably not.

If I had started with a solid color of fabric like they suggested and didn't use transparent paint for the first layer, I would probably be done already. But no, I had to use some really UGLY fabric that I've been saving for some odd reason. Usually, layering makes the fabric more interesting. At this point, I'm not convinced that I should have wasted my time.

There are a lot of step by step photos so I'll only show 2 pieces of fabric today.

Fabric 1
 Hand dyed fat quarter. Not sure who made this, but it's not my style.
Squished fabric into a bag and added transparent Setacolor and Lumier paint. Still ugly
Squished fabric into a bag and added Neopaque and Lumier paint.
I still see the stamped design on the front side of fabric.
Back side of fabric . . . much better, but not great.

Fabric 2
All the steps are the same as Fabric 1.
I made this ugly fabric a long time ago using Soft Scrub with bleach.
 Setacolor made it worse.
 Front of fabric is still ugly.
Back of fabric is still ugly.

Am I completely wasting my time? Should I throw it away OR add one more layer?