Showing posts with label quilting. Show all posts

October 6, 2014

Final Quilting Decision

I'm about to quilt the final section of the sky and I'm trying to decide what color of thread to use. Yesterday, I thought I was going to use ice blue thread, but today it isn't even a contender. Between the three colors shown, iris (darker purple), blue and amethyst (lighter purple), I'm leaning towards the iris. I think I'd like to darken up this area a bit and the purple would do that and add a little warmth. Which one do you like best?


I can't show you the whole quilt yet because it's going into an exhibit soon, but I bet you can guess what it is. Here's a close up of some of the quilting on my hand dyed fabric. Hope you can see it, the thread color blends pretty well.


I've been using my homemade pinmoor holders a lot and I absolutely love them. They stay in pretty well even through all the shifting, rolling and scrunching that you do while quilting, but they're easy to remove when you pull on the foam. I purchased extra pins and have about 120 now.

February 23, 2011

Tea Fire: Finishing Up

You've seen this piece right after I finished the top. It hung on my design wall, along with many others, waiting for quilting inspiration to hit, but it never hits. I know this. Why does it take me so long to start? Once I start quilting, it goes well enough. I don't understand why I have this block. Deadlines give me a reason to finish. Without deadlines, I would probably have a room filled with quilt tops.
Here's a photo of some of the quilting. I like quilting through two layers, front and batting. If you look real close you will see two vertical areas that aren't quilted as dense. Those areas will contain the final quilting lines.
After the majority of the quilting is finished, I attach a back, then I add the last
bit of quilting . . . just enough to hold the layers together.
This is what the same section looks like from the front. I'll be adding the back tonight and finishing up with the sleeve and label tomorrow night. Almost done with my third fire quilt.

November 13, 2010

Wonky 9-Patch Finished

Can it be true? I actually finished some old projects. First, was the log cabin that now resides with my son in Topanga Canyon. Next in line were a couple of small wall quilts which I forgot to photograph, and the latest is this wonky 9-patch baby sized quilt.
I really like the cheerful colors in this one.
Here's a close up showing the wonky quilting. It feels great to finally get this finished.
And here is the next pile of quilts I'll be working on. I backed all of them with batting and added a ton of safety pins. A couple of years ago, I started quilting through the top and batting only. No backing. I do a fair amount of quilting and like the stability that the batting provides. When I finish all the stitching, I sew all the layers together, all the way around, with no opening. I cut an X through the backing layer and flip the whole thing inside out through the X. I quilt around some of the major areas, cover the X with a label or with the hanging sleeve and it's done. I'm not sure how long I'll continue to use this method, but for now, it suites me just fine.
Does anyone else out there quilt through two layers? I'm sure I can't be the only one!

June 10, 2008

Coming Together

The idea for my Art From Scrap challenge piece "Coming Together" began with the quilting samples shown here. I had them stacked up and wondered what I was going to do with them. Do I put them in a drawer and look at them every couple of years. No, that's a waste. Why not paint the samples? I dug out my textile paints and a roller and had at it. Then, I added oil stick on top . The quilted texture showed up nicely, lots of depth. I cut the shapes and added the strings and sewed it all down. Here it is, in all of it's lime green glory.

Here's a detail shot where you can see the layers of color and the stitching line. Little by little, it was "Coming Together.

All of the entries will be on exhibit at Art From Scrap through July 19th. There will be a silent auction with the proceeds going towards children's art classes.

I went to see A Tear in the Fabric exhibit at Cal Poly. My friend, Jeanne Surber's "Size Prison" piece is in this powerful show. Definitely worth the drive!

June 1, 2008

Photos Printed on Fabric

I shot some photos of lillypads at a local pond and couldn't resist the urge to manipulate the colors. They had glossy green leaves and beautiful yellow flowers before I had my way with them. I really like the large shapes and glowing colors. I printed several of them on cotton fabric with my 
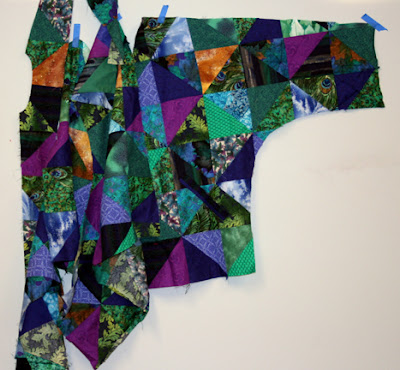
ink jet printer and auditioned some colors that I think will work well with the blues and purples. A little orange will make a big statement.
Whenever I have a piece layered and ready to quilt, I freeze up. I know how to quilt, but I don't know WHAT DESIGN to quilt it with. So, I hang it on my design wall and stare at it, hoping that it will reveal the perfect quilting design. Unfortunately, it never happens! Finally, I get tired of staring at it and decide to go for it. As I begin, I have no idea what I'm going to do and that makes me nervous. I'm always afraid that the quilting isn't going to look good.Somehow it magically evolves and turns out looking good. Now, I want to take it to the next level; I want the quilting to be great. There are two ways to achieve quilting greatness, the first is to take it to my dear friend Susan Italo. The second is practice, practice, practice, both with pencil and paper and with the sewing machine. For me, the easiest designs are the vines with heart shaped leaves, garlic bulb shapes and spirals. If you have any helpful quilting tips or designs you like to use, drop me a line. Bet you can't guess where I went today? Awww . . . you guessed it, the Santa Barbara Zoo. Here's a close-up of an elephant eye . . . I know, it's a little odd, but the texture is fantastic.
And here's a beautiful macaw. They love posing for me.

March 16, 2008

Fire Storm Completed

It feels great to be creative again. I hoping that all the aches and pains are gone for good. I just finished quilting a wholecloth piece that I painted a while ago. I think it turned out really great. I really didn't plan on painting a fire scene, but when I stood back and looked at it, it reminded me of the Santa Barbara wildfire that burned for months. There are two fabric trees appliqued to the foreground and tulle, organza added to the top section to resemble the flames and smoke. Here's a photo of the finished quilt.
I've added a binding that has a very narrow piped edge along the inside, in this case it is purple. It's a technique that Ricky Timms features on his Grand Finale DVD. This little flash of color (it's about 1/32" wide) provide a big impact. I have to say that it isn't easy and wouldn't recommend it to people that get frustrated easily. It took more hours than I want to admit, but I'm in love with the look and the fact that it is completely done by machine is a bonus. This is the second time I've done a binding using this technique. I'm guessing that after doing it 5 or 6 times, it will become quicker and easier.
I bought this really fun package of paper clips and thought I could use them for rubbings but the hand is the only design that works well. The others have too many 3-D parts. They made me smile . . . so they had to come home with me.

January 28, 2007

Fibervision Meeting

I met with my Fibervision Group (or as my husband calls us, The Like Minded Thinkers). Although we are all quite different, there is a fair amount of truth to that statement. We are all interested in educating the public and promoting quilting as an art form. We enjoy exploring, and experimenting with new products and techniques. It's an extremely talented group of artists and I am honored to be part of this group.


Our newest challenge is titled "Regurgitation". We each put a UFO into a paper bag along with a photo of the UFO and traded bags. We can do anything we want to the UFO; cut, paint, burn, add other pieces, etc.

We will return with the finished product in October. Here are photos of a few of the UFO's. Stay tuned for the exciting finale!